How to Build a Raft Slab Foundation: A Step-by-Step Guide

In construction, the foundation is crucial for a building’s stability and longevity. Slab-on-grade foundations are a popular choice for small buildings. By maintaining the foundation at ground level and eliminating the need for a basement, these foundations minimize moisture infiltration and reduce heating costs.
Canadian climates present challenges like frost heave and settlement, requiring careful attention to structural design and insulation placement. This guide will explore the step-by-step process of building a raft slab foundation, providing insights into design principles and best practices. Whether you’re a skilled builder or someone who loves to do it yourself, this guide will give you the tools you need to create a strong foundation for your project.
Before You Build a Raft Slab Foundation Know the Restrictions
Building a raft slab foundation demands a precise approach that accounts for various factors, including geographic location, structural requirements, and insulation specifications. This section delves into the design method used in this guide, highlighting its applicability, limitations, and crucial considerations.
Limitations
The design method outlined here is tailored to accommodate most regions across Canada. However, it’s essential to recognize certain limitations to its application:
Residential Buildings: The method is primarily intended for use in Part 9 residential buildings, specifically those with two storeys or fewer and typical house floor loads.
Non-Permafrost Regions: Raft slab construction is suitable for regions with an average mean annual temperature exceeding 32°F (0°C). Designs for permafrost regions necessitate different strategies to maintain ground stability.
Soil Bearing Capacity: The slab’s design must align with the soil’s bearing capacity and consider any unusual loading conditions.
Assumptions
Certain assumptions underpin the application of this design method:
Heated Buildings: The method is assumed to protect buildings that remain heated for extended periods adequately. Unheated structures may require additional considerations.
Timely Completion: To prevent frost-related issues, buildings must be completed, backfilled, and heated before freezing weather occurs.
Code Compliance: Elements above the foundation must adhere to local building codes or the National Building Code for structural integrity.
Considerations
Builders should pay close attention to insulation specifications and site grading:
Insulation Type: Insulation in contact with soil must meet Type II, III, or IV specifications per the design requirements.
Floor Comfort: The specified insulation levels typically ensure adequate floor comfort. However, builders should adjust as per specific site conditions.
Site Grading: Proper site grading is imperative, ensuring the finished grade slopes away from the structure to divert surface water from the foundation.
Insulation Protection: To prevent damage to slab insulation during construction and throughout its service life, covering the wing insulation with a minimum of 8″ (200 mm) of backfill is crucial.
Foundation Design Procedure for Raft Slab Foundation

Constructing a robust and efficient raft slab foundation involves a systematic approach that accounts for various factors, from climate severity to insulation specifications. This section delves into the step-by-step design procedure, offering insights into each stage to guide builders through the process seamlessly.
Evaluating Climatic Conditions
The first step entails assessing the severity of climatic conditions near the site. Refer to your local building code for guidelines. Builders can also determine the degree day rating, providing crucial insights into the environmental challenges that may impact foundation design.
Determining Insulation Requirements
The width and thickness of the insulation layer can vary based on the number of days below 18°C and the designated foundation zones (A, B, or C), builders can identify the required R (RSI) value of insulation for optimal thermal resistance.
Design Factors to Consider
Upon understanding the insulation requirements, it’s essential to consider several critical design aspects:
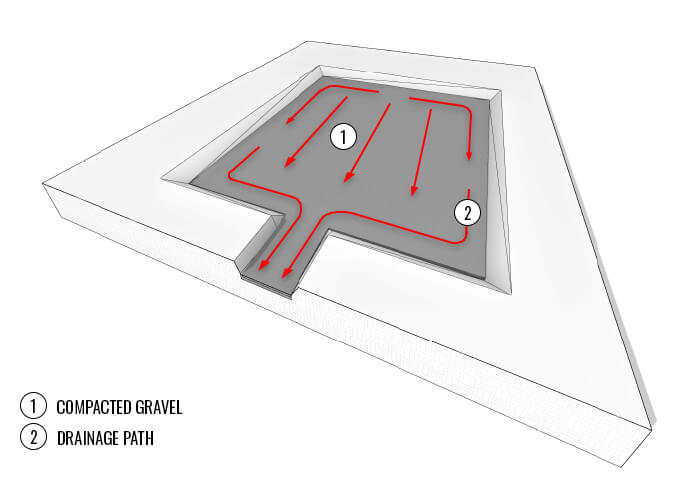
- Excavation and Drainage: The excavation must be appropriately sloped to direct water towards an outflow point, such as an exterior drain or dry well. A minimum of 6″ (150 mm) of free-draining granular material should line the excavation for adequate drainage.
- Insulation Specifications: The entire slab must be insulated to a level of R 10 (RSI 1.8), and the insulation in contact with the soil must meet specified standards (Expanded Polystyrene Type II or III or Extruded Polystyrene Type IV).
- Concrete and Reinforcement: The concrete should have a minimum strength of 25 MPa, with 5-7% air entrainment. Reinforcing steel (#10) must be adequately covered with a minimum of 3″ (75 mm) of concrete, and proper curing practices should be employed.
- Additional Components: Various components, such as wood formwork, polyethylene sheeting for soil gas control, and geotextile membranes, are integral to the foundation’s integrity and longevity.
- Control Joints and Wire Mesh: Saw-cut control joints should be provided every 14-18′ (4-5 m) to mitigate cracking. Where 25 MPa concrete is unavailable, welded wire mesh should be installed at the mid-point of the slab for reinforcement.
By sticking to these requirements builders can ensure the construction of a foundation with a typical cross-section that meets structural requirements and effectively withstands environmental challenges.
Construction Procedures for Raft Slab Foundation
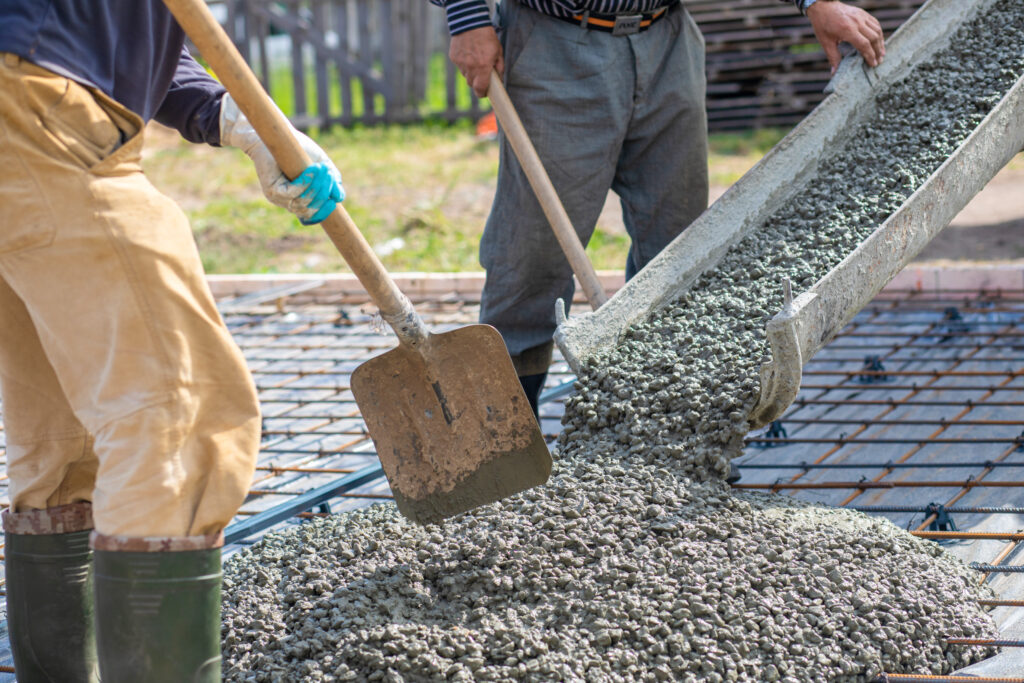
With the design variables established, it’s time to delve into the practicalities of constructing a sturdy raft slab foundation. This section outlines a systematic approach to site preparation, formwork assembly, and concrete pouring, ensuring careful execution at every step.
Step 1: Site Preparation and Excavation
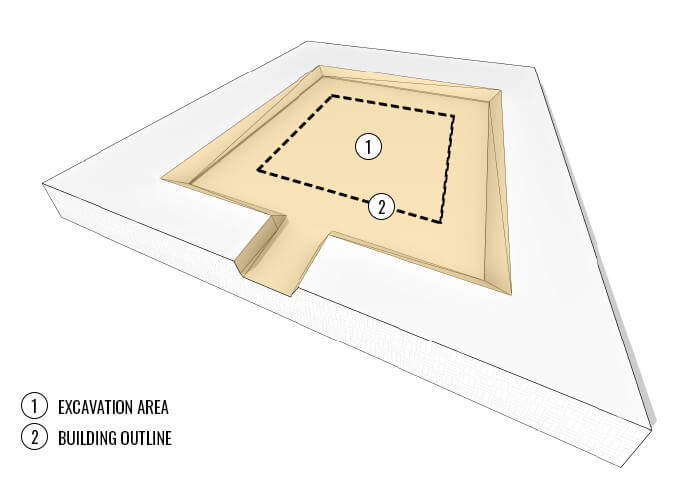
Clearing the site is the initial crucial step. Remove all organic material, including topsoil, roots, and vegetation, to a depth of 6-12″ (150-300 mm). Excavate an area large enough to fit the building’s footprint and the required width for perimeter wing insulation. Slope the excavation to an outflow point, ensuring proper drainage is achieved.
Step 2: Stone Drainage Bed Installation
Lay a minimum of 6″ (150 mm) of 3/4″ (19 mm) diameter clear stone under the building footprint, extending it 2′ (600 mm) beyond the slab perimeter. Compacting the stone ensures stability and adequate drainage. Avoid using drainage tile or “O” pipe to prevent undermining the slab.
Step 3: Building Formwork
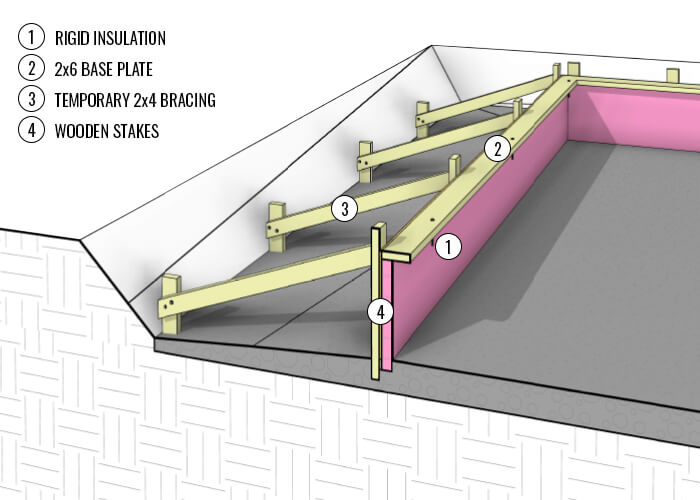
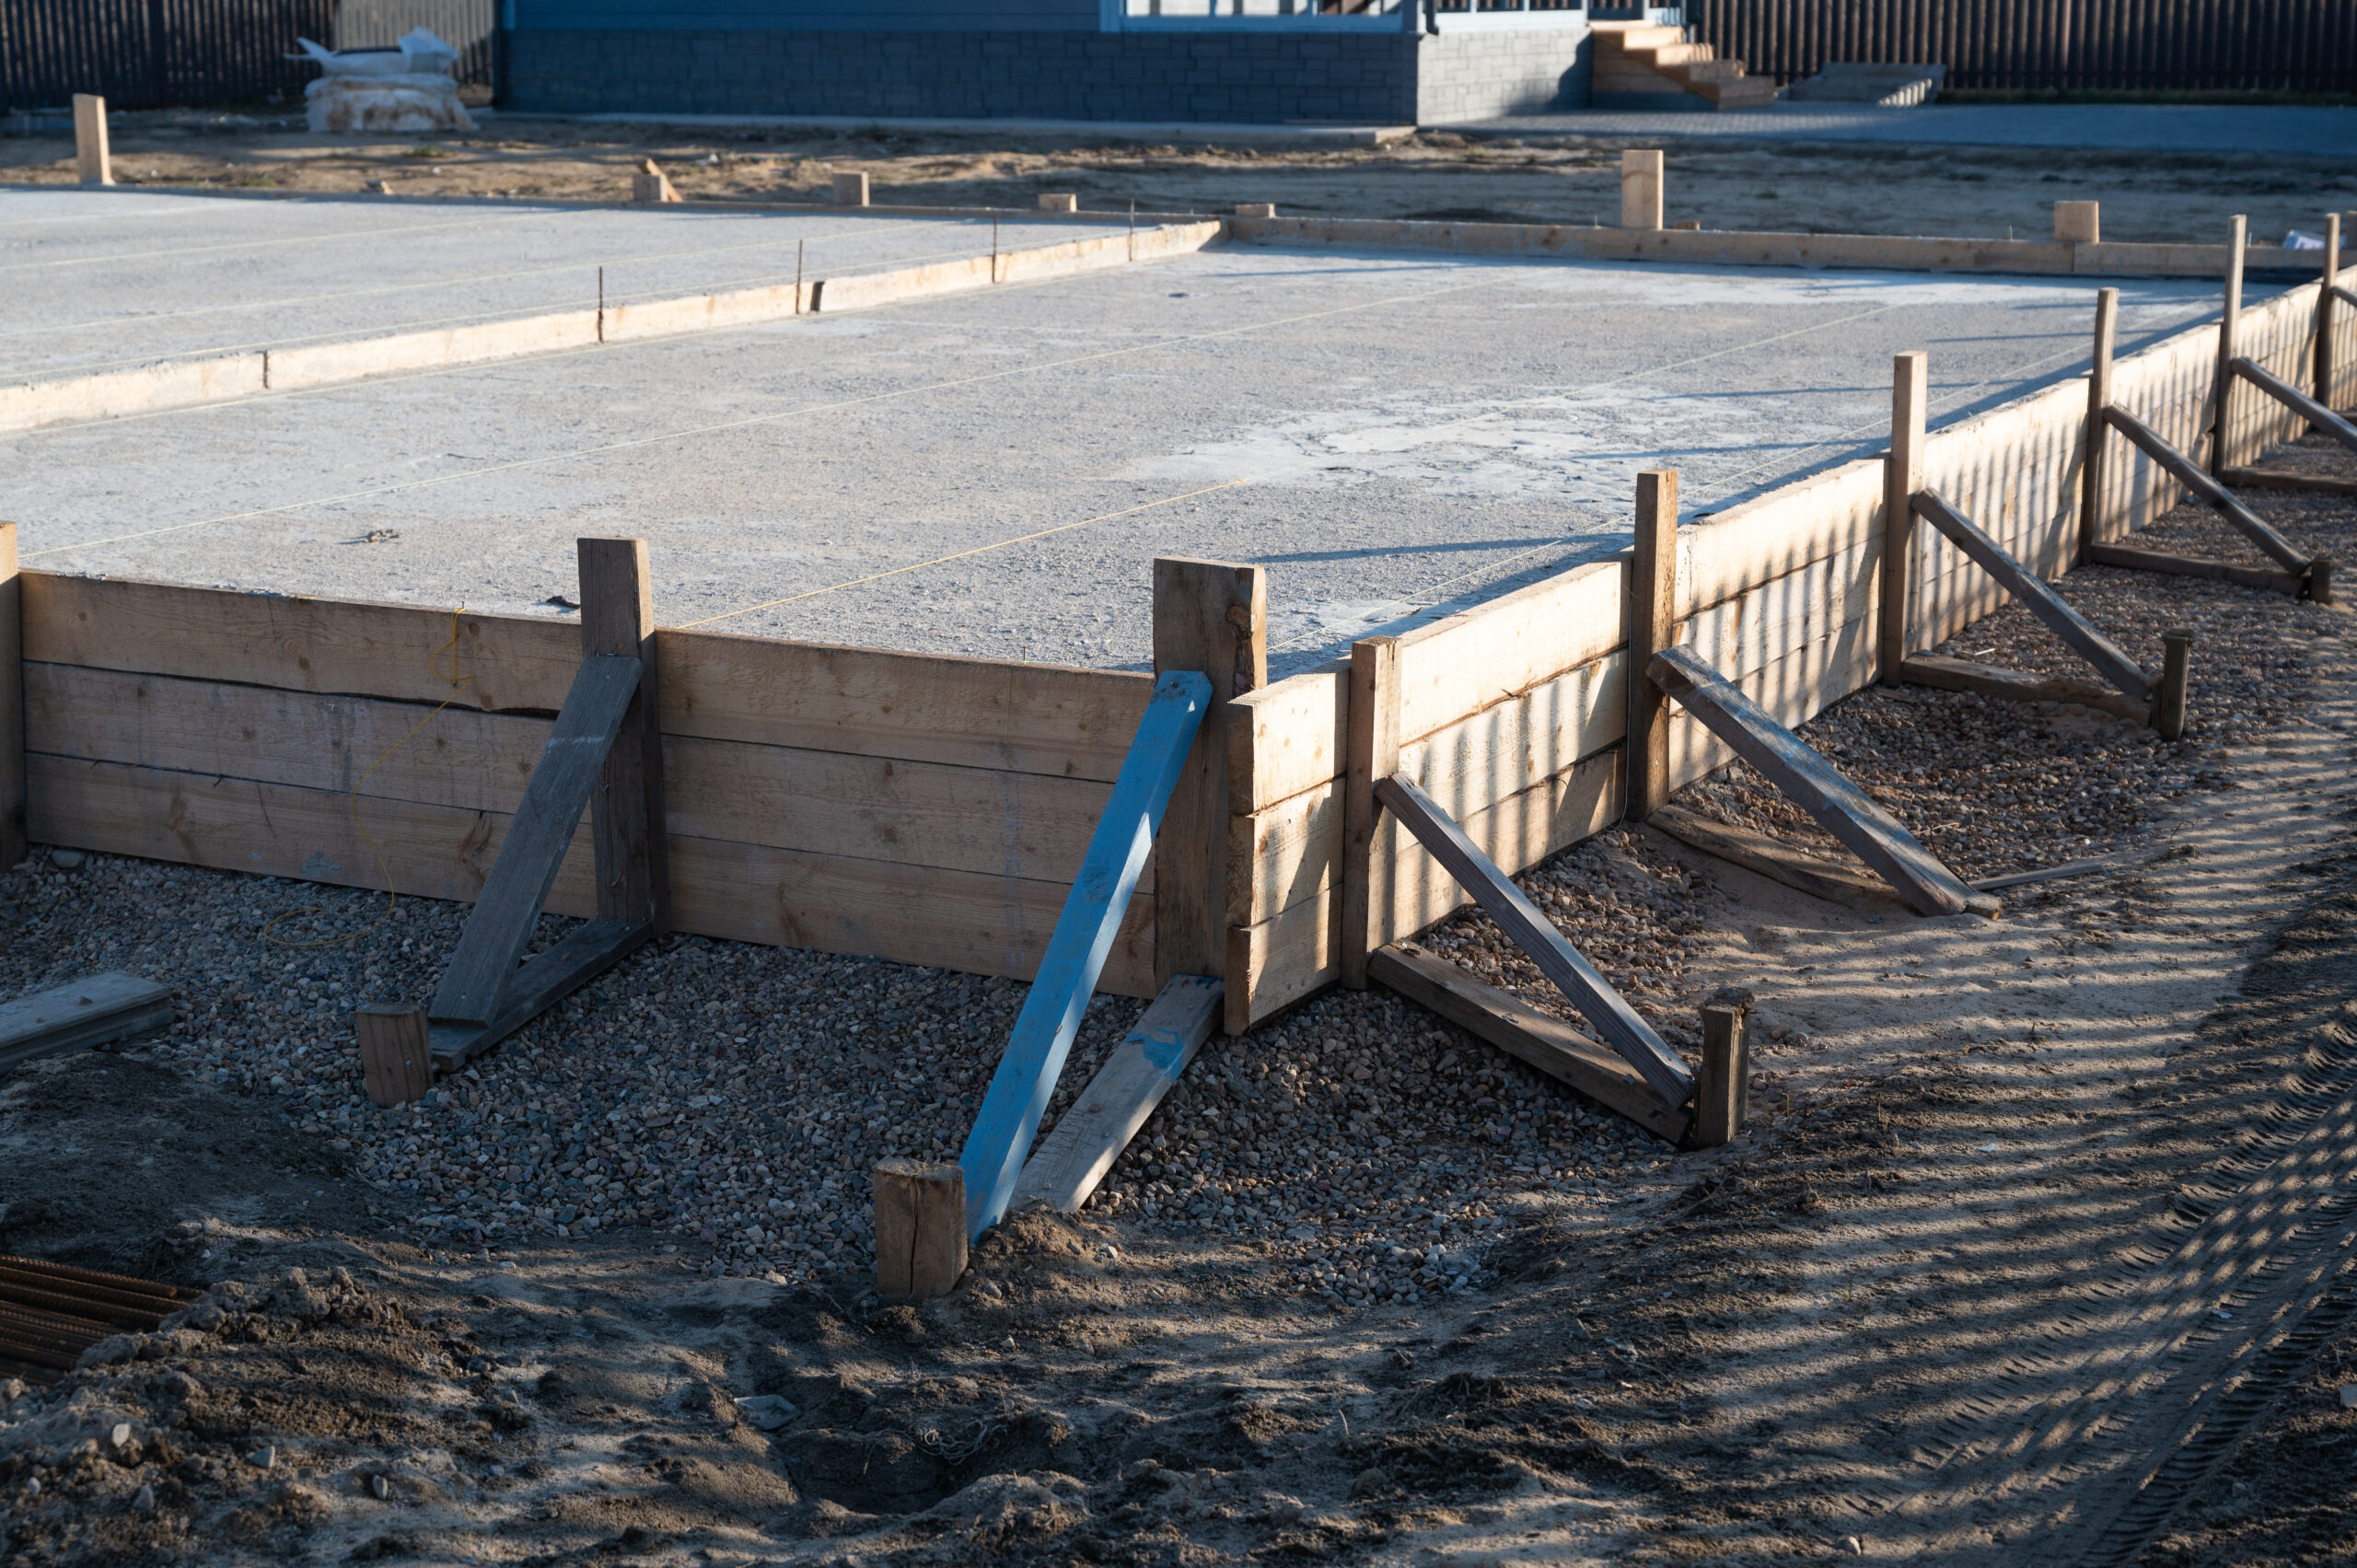
Constructing sturdy formwork is key for shaping the foundation. Stake out the perimeter of the building, keeping in mind the thickness of plywood forms and slab edge insulation. Nail pressure-treated plywood strips to a treated baseplate, ensuring tight joints and proper bracing. Attach the formwork to layout stakes, leaving one side open for material movement.
Step 4: Placing Insulation Layer
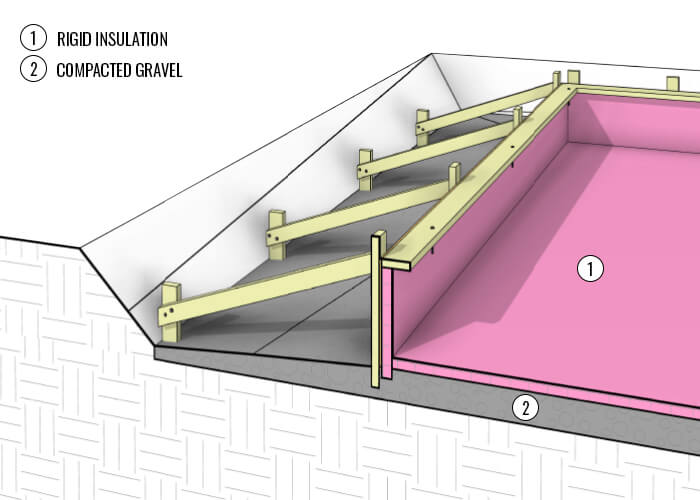
Install rigid polystyrene insulation (R 10 (RSI 1.76)) over the levelled stone drainage bed inside the forms. Ensure tight joints and full contact with the granular material, especially around service entrances. Secure the insulation to prevent shifting during concrete pouring.
Step 5: Polyethylene and Sand Installation
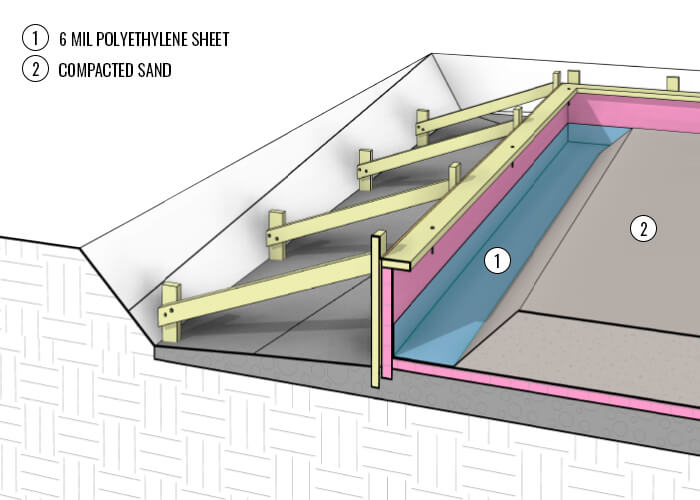
Lay a 6 mil polyethylene sheet over the insulation layer, overlapping joints by at least 12″ (300 mm). Spread a minimum of 6″ (150 mm) layer of sand over the center area of the excavation, sloping it towards the base of the perimeter footing. If required, accommodate thicker footings for interior bearing walls.
Step 6: Reinforcing Steel Placement and Concrete Pouring
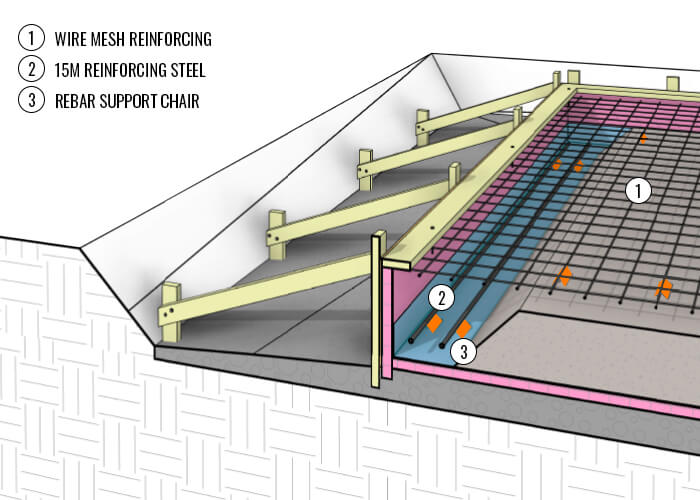
Position footing rebar to achieve 3″ (75 mm) concrete coverage. Use stone or fabricated wire mesh chairs to support the steel at the required height. Install wire mesh as needed, ensuring proper concrete coverage. Pour concrete carefully to avoid segregation, keeping a minimum thickness of 6″ (150 mm).
Step 7: Finishing Concrete and Insulation Installation
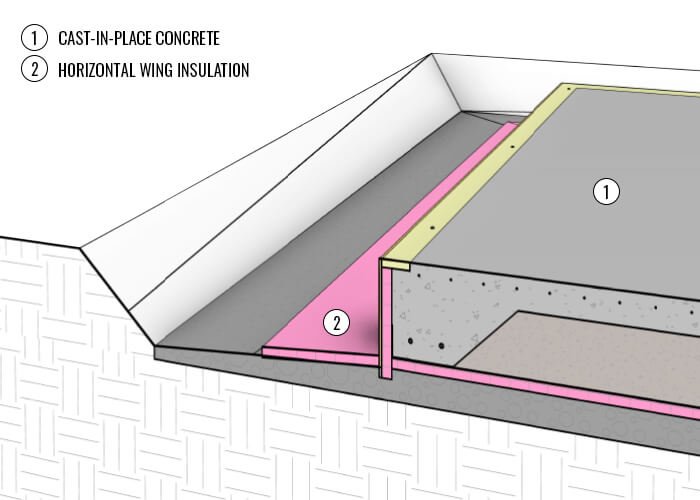
To prevent surface defects, avoid finishing concrete in the presence of bleed water. Cut control joints to minimize cracking and ensure proper moisture retention for at least three days after placement. Once the concrete is set, install horizontal wing insulation around the building perimeter per design requirements. Backfill with soil, ensuring proper drainage away from the foundation.
Building a Solid Raft Slab Foundation
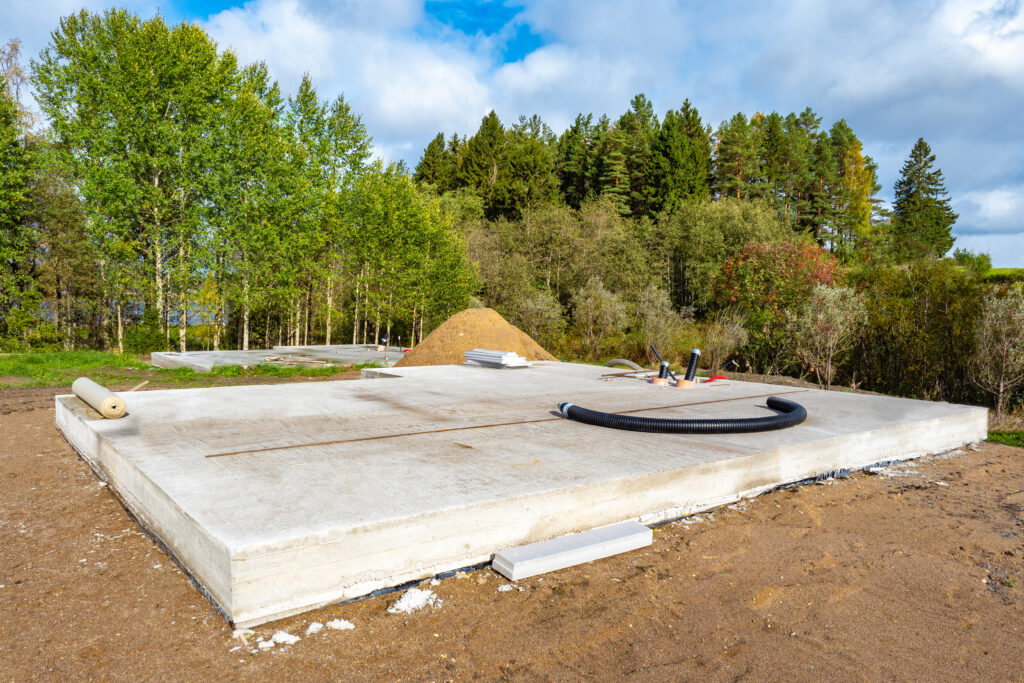
Building a raft slab foundation needs careful planning and accurate execution. This guide gives important tips for making a strong foundation. It explains the benefits of insulated slab-on-grade foundations and how to follow the design and construction steps.
By following the simple steps explained here, builders can make sure their buildings last a long time and stay strong. Paying close attention to every detail, from getting the site ready to pouring concrete and adding insulation, is really important.
As you start building, use this guide to help you create strong foundations. Let’s build a future that’s solid and sturdy, one step at a time.
Disclaimer
This article is a guide for slab-on-grade, frost-protected, shallow foundations for heated buildings, adhering to specified limitations. It is not intended to cover other aspects of house construction. The design and execution of the foundation lie solely with the builder/contractor. Therefore, we bear no responsibility for any defects.
Acknowledgement
Credit to the National Building Code of Canada, the Canada Mortgage and Housing Corporation (CMHC) and the National Research Canada (NRC) for providing the information used in this article.
Share:

Mia


Social Media
Most Popular

When Do You Need a Building Permit in BC?

How to Customize a House Plan | 3 Easy Steps
What to Look for in a House Plan | Canadian Permit-Ready Floor Plans


Selecting the Perfect Garage Plan | 8 Expert Tips
Subscribe To Our Newsletter
No spam, only notifications about new products, posts & updates. Unsubscribe at anytime.
House Plan Categories
Related Posts

How to Build a Raft Slab Foundation: A Step-by-Step Guide
In construction, the foundation is crucial for a building’s stability and longevity. Slab-on-grade foundations are a popular choice for small buildings. By maintaining the foundation at ground level and eliminating the need for a basement, these foundations minimize moisture infiltration and reduce heating costs. Canadian climates present challenges like frost heave and settlement, requiring careful

When Do You Need a Building Permit in BC?
So, what is a Building Permit, and when do you need one? To put it simply, a building permit is like an official permission slip you need from the city before you can start a construction project. It’s an official document indicating that local authorities have reviewed and approved your construction project. It’s a way

How to Customize a House Plan | 3 Easy Steps
Get ready to let your creativity soar because we’re about to take you through the simple and exciting process of customizing a floor plan. In just 3 easy steps, we can show you how to customize a house plan. You’ll be able to transform an almost-perfect plan into your dream home. Whether you’d like to

What to Look for in a House Plan | Canadian Permit-Ready Floor Plans
When choosing a floor plan in Canada, there are several factors to keep in mind. While aesthetics, such as layout, functionality, window placement, and overall size, are often the first considerations, it’s equally crucial to prioritize the floor plan’s functionality. Ensuring the floor plan includes all the necessary components to meet local and Canadian building


